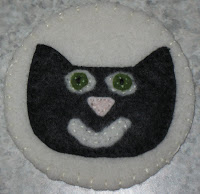
It's very interesting to take a look at the things that really make you smile. Most often, for me, it's the small things that make my day. If you want to know more check back on February 1st, I'll be posting my twenty things I need then. In the meantime join the swap or just ponder on the little things in your life that you can't live without.
Saturday, January 11, 2014
New Swap
It's very interesting to take a look at the things that really make you smile. Most often, for me, it's the small things that make my day. If you want to know more check back on February 1st, I'll be posting my twenty things I need then. In the meantime join the swap or just ponder on the little things in your life that you can't live without.
Saturday, December 14, 2013
A Little Holiday Zentangle Tutorial
It's holiday time. I like to make something to give to my co-workers, but this year I was struggling to come up with an idea. I've decided to make some holiday Hershey Kiss pretzels and Rolo pretzel bites but I wanted a tag to go on each bag of goodies. I found some wood flower shapes at the Dollar Tree and inspiration struck. I created some wooden Zentangle tags that can double as a Christmas ornament.
I gathered my materials:
- wood shapes(the package had 10 shapes for $1)
- red and green acrylic paint
- paintbrushes
- black Sharpie
- old plastic lid for paint
- paper to protect my work surface
- DMC thread
First I watered down some red acrylic paint. There is no exact science to this; just squirt some paint on an old plastic lid, add a little water and mix. I painted one side of my wood pieces. I did a couple of coats until I was happy with the color then set them aside to dry.
Once they dried I flipped them over to paint the backside and the edges of my wood pieces. Then I set them aside to dry again.
After letting them dry, I used the black sharpie to Zentangle on the front of each flower shape. Note: I tried drawing on the wood first then painting but it didn't work as well. Painting first stopped the Sharpie from bleeding across the wood. Plus the black turns out lighter when you draw then paint over it. After trial and error, my advice is paint first, then draw.
Here's a group of the Zentangle tag/ornaments I finished. I wrote To: and From: on the backside with Sharpie so they will work as a gift tag on my holiday goodies.The last step is to drill a hole in the center and thread a piece of DMC through. Tie a knot then hang them on your tree or attach them to your Christmas gifts.
Monday, December 9, 2013
Oh Christmas Tree
We got our Christmas tree set up last night. I love sorting through the ornaments and reminiscing as we hang each ornament. Our tree is a combination of purchased, handmade and handed down ornaments. It's full of memories for each of us. We actually have more ornaments than we have tree space.
This year I have a small "handmade" tree in the front foyer. The tree isn't handmade but it's filled with handmade ornaments from the Year of Enchantment swap, this year's bird ornament swap and ornaments I've made with my own hands. Keeping with the handmade theme, Melinda made the table runner under the tree for me as part of the Christmas in July swap. It's a perfect base for my handmade tree. I love that this tree is full of ornaments that were lovingly made! It makes me smile every time I walk by it.
Happy holidays!
Thursday, November 28, 2013
Happy Thanksgiving
I love this little card! It's sweet so it's definitely a keeper. I couldn't stop chuckling every time I looked at it. I love that Chunk is a turkey! She explained that pilgrims didn't have pet dogs instead they had turkeys.
Hope you have a wonderful Thanksgiving surrounded by your family and friends!
Monday, November 25, 2013
The First Snow
For kids the first snow is always exciting. I went to let Chunky out on Saturday night and what did I see . . . SNOW! I didn't even know it was supposed to snow. Chunky ran around like a crazy little dog, eating snow while the girls went outside to play and create in the snow. Don't you love these little snowmen by the pool?
Here are two crazy girls enjoying the first snow. Laughing, yelling and just having some good old fashion snow fun. I wish I still thought the first snow was magical. The older I get the more it just feels COLD and reminds me of the months of snow and shoveling ahead. On a plus note I guess the older I get the faster time goes so before I know it the snow will melt and it will be spring again. Until then the girl and the dog will enjoy the snow and I'll enjoy the hot chocolate!
Saturday, October 19, 2013
Painted Wine Glass Tutorial
Materials:
Wine glass
Rubbing alcohol
Enamel paints(I use Folkart enamels)
Paint brushes, Q-tips or foam circles
Paper towels
Water
Directions:
Step one: Gather your materials and get ready to create a fun wine glass.
Step two: Wash your wine glasses and dry them. I've had luck purchasing my wine glasses at the Dollar Tree. They're a big glass but I don't mind.
Step Three: Wipe the outside of the glass with rubbing alcohol. This removes the oils that your hands leave behind. (I've skipped this step before and the glasses turned out fine, but the directions on the paint include this step.)
Step Four: Start painting. I paint on my glasses but don't paint too close to the rim. You can use paint brushes, Q-tips or foam circles to apply the paint.
I did a circular design for my glass using a set of Martha Stewart foam circles I found on the clearance rack of my local craft store. They work really well for making polka dots. If you don't have foam circles, that's okay, I've used the eraser end of a pencil to make polka dots.
Note: If you're worried about painting free hand you can draw your design on with sharpie and paint over it. You may want to coordinate the color of the sharpie with the color you'll be painting so the Sharpie won't show through.
Next I add a design to the base of the glass.
Step Five: Once you've finished painting allow your glass to dry for 1 hour.
Step Six: Place your glasses on a baking sheet then put them in a cool oven. Turn on the oven and set the temperature to 350. Once the oven reaches 350 let your glasses bake for 30 minutes. When they've finished baking turn off the oven and leave them in the oven to cool.
Step Seven: Once your glasses have cooled, wash and dry them again. I hand wash all of my painted wine glasses and haven't any problems with paint chipping or coming off. The paint bottle says they should be top rack dishwasher safe, but I've never tested it.
Step Eight: Pour yourself a glass of wine, then sit back and admire your new wine glass!
Painted wine glasses make great gifts for family, friends and neighbors. They are pretty, inexpensive and totally unique. Kids can even do this project. My 9 year old daughter painted the other two glasses in the picture. She also painted two last year as a gift for her teacher.
Friday, October 18, 2013
Something From School
I'm a special education preschool teacher. I teach three, four and five year olds. Due to the nature of my job it's not often I can share pictures from my classroom, but today I have something I can share. I went to a fabulous workshop this summer where I learned about caring for about Monarch Butterflies. The workshop is offered by The Monarch Teacher Network. Our first preschool unit is "Changes All Around Me" so this fall we have been raising monarch caterpillars in my classroom.
Here we have one caterpillar in it's chrysalis and a second in a J getting ready to go into a chrysalis. This rearing cage in made from a tomato cage and tulle, it's been great for raising our caterpillars. I learned how to make it in the workshop.
We also created these little butterflies by rolling marbles in orange and black paint then cutting them out to be the size of an actual monarch. We're participating in the Monarch Butterfly Symbolic Migration. Our paper butterflies were tucked into the larger butterfly before being mailed off. They will eventually be sent off to children in Mexico to symbolize the journey Monarch Butterflies make each fall. Then in the spring we'll receive a set of paper butterflies made by children somewhere in North America to symbolize the Monarch's journey North in the spring. I'm excited to participate. It's been a lot of work to care for these little creatures but it's been well worth it. My kids have been so excited to see how they have changed.
Here we have one caterpillar in it's chrysalis and a second in a J getting ready to go into a chrysalis. This rearing cage in made from a tomato cage and tulle, it's been great for raising our caterpillars. I learned how to make it in the workshop.
Today, two weeks after the first caterpillar went into it's chrysalis I arrived at school to find two beautiful monarch butterflies. The children haven't seen them yet as my students don't attend on Fridays. I've emailed butterfly pictures to all the families and have my fingers crossed that the flowers and the apple juice I left in the rearing cage will tide them over until the children & I arrive on Monday morning.
We've been working on patterning in preschool so we looked at the patterns on our caterpillars to create these paper caterpillars.
We also created these little butterflies by rolling marbles in orange and black paint then cutting them out to be the size of an actual monarch. We're participating in the Monarch Butterfly Symbolic Migration. Our paper butterflies were tucked into the larger butterfly before being mailed off. They will eventually be sent off to children in Mexico to symbolize the journey Monarch Butterflies make each fall. Then in the spring we'll receive a set of paper butterflies made by children somewhere in North America to symbolize the Monarch's journey North in the spring. I'm excited to participate. It's been a lot of work to care for these little creatures but it's been well worth it. My kids have been so excited to see how they have changed.
Subscribe to:
Posts (Atom)