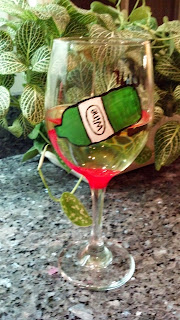
Materials:
Wine glass
Rubbing alcohol
Enamel paints(I use Folkart enamels)
Paint brushes, Q-tips or foam circles
Paper towels
Water
Directions:
Step one: Gather your materials and get ready to create a fun wine glass.
Step two: Wash your wine glasses and dry them. I've had luck purchasing my wine glasses at the Dollar Tree. They're a big glass but I don't mind.
Step Three: Wipe the outside of the glass with rubbing alcohol. This removes the oils that your hands leave behind. (I've skipped this step before and the glasses turned out fine, but the directions on the paint include this step.)
Step Four: Start painting. I paint on my glasses but don't paint too close to the rim. You can use paint brushes, Q-tips or foam circles to apply the paint.
I did a circular design for my glass using a set of Martha Stewart foam circles I found on the clearance rack of my local craft store. They work really well for making polka dots. If you don't have foam circles, that's okay, I've used the eraser end of a pencil to make polka dots.
Note: If you're worried about painting free hand you can draw your design on with sharpie and paint over it. You may want to coordinate the color of the sharpie with the color you'll be painting so the Sharpie won't show through.
Next I add a design to the base of the glass.
Step Five: Once you've finished painting allow your glass to dry for 1 hour.
Step Six: Place your glasses on a baking sheet then put them in a cool oven. Turn on the oven and set the temperature to 350. Once the oven reaches 350 let your glasses bake for 30 minutes. When they've finished baking turn off the oven and leave them in the oven to cool.
Step Seven: Once your glasses have cooled, wash and dry them again. I hand wash all of my painted wine glasses and haven't any problems with paint chipping or coming off. The paint bottle says they should be top rack dishwasher safe, but I've never tested it.
Step Eight: Pour yourself a glass of wine, then sit back and admire your new wine glass!
Painted wine glasses make great gifts for family, friends and neighbors. They are pretty, inexpensive and totally unique. Kids can even do this project. My 9 year old daughter painted the other two glasses in the picture. She also painted two last year as a gift for her teacher.


4 comments:
oh thank you for this! I love the one you gave me....now I can try to make some myself!
Awesome ..... now I know how you did it :-)
Love them.
so pretty! I am not a wine drinker but I love the glasses!
This is really beautiful and thank you for this! Now I'm determined to make my won work. Wish me luck!
Wine Glasses
Post a Comment